It has taken me far too long to work on this lesson because I kept looking for an interesting subject. I am not completely happy with this subject either, but I think I was able to use it to complete the lesson. For this exercise I packed up my gear and headed to the Liberty Memorial in Kansas City, Missouri. This is the only national World War I Memorial in the country. Pictures cannot do it justice, so if you are ever in Kansas City, put this on your must see list.
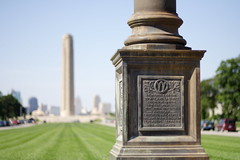
This first photograph (the one at the very top) is taken keeping the object in the foreground in focus. This was taken in bright sunlight, and I used a polarized filter for most of the shots. I used the f1.8/50mm for this series, however, and I don't have a filter that fits that lens, so the sky is kind of washed out. I wanted a very noticeable difference between what was in focus and what was not, so I used the fastest lens I had. I am fairly happy with the way this one turned out.
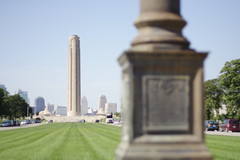
This one, I hate. This is supposed to be the exact same scene with the background in focus and the foreground not in focus. The 50mm lens really let me down here. I don't remember there being a lot of haze which might have obscured the object so far away, but for some reason it is still very fuzzy. I had the autofocus point set right on the tower, and I took several shots to make sure the focus was correct, but it still looks terrible. This may have been a poor choice of lens by myself as the f1.8/50mm is usually a very good lens. If I had realized how bad this was going to turn out, I would have put the kit lens back on and captured a few more photographs for comparison.
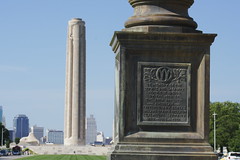
This was the second part of the lesson, which was to compose a scene with something both far and near. In this first photograph I captured both subjects with a wide lens. I also stopped down the aperture quite a bit to get both objects in focus. I am relatively pleased with the results, but there is obvious room for improvement.
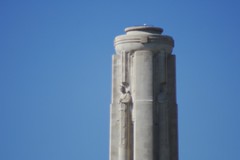
In this photograph, I pushed the zoom out to 300mm and captured just the top of the tower. This begins my love/hate relationship with the Canon 75-300mm lens. I can't believe how sharp this lens can be up close, and how soft it can be when I push it out to 300mm. I have never captured a sharp photograph with this lens at 300mm. I used to think it was just me pushing the lens too hard, not using a stable tripod, not enough light, etc. It is not just me. This lens is terrible when zoomed in. Back down around 75-200 I really like it. I routinely use it for portraits that come out looking very sharp. Let me give you another example. I moved in MUCH closer by walking a LONG way and got this next photograph.
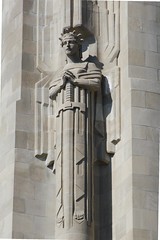
This was taken with the same lens, polarized filter, tripod, etc. Identical to the 300mm shot. I think this turned out very crisp and provides very good detail. It is 217 ft. to the top of the Liberty Memorial tower where this statue is, so this is no less than 300 ft. away from the subject. The difference is the focal length is only 180mm.
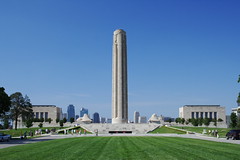
This is my favorite photograph of the day. I used the rule of thirds (more or less) for the horizon, but putting the tower at the center made this photograph look much better than when it was offset. The polarized filter really made the sky look great, and the details of the monument itself are not dark. This is not really part of this particular lesson, but I was happy with it, so I wanted to share it.
Two hours later, I packed up my gear and headed for home. I feel like I learned a lot both about the lesson itself, and about my gear. The one thing I forgot was water. The temp was around 94 degrees, and after 2 hours in the sun, I was very dehydrated. Next time, I am throwing a bottle of water in my bag.