

I needed to do a little home repair and I decided to use my camera to document the project. See, there is this tiny little hole in my wall. Now, I know one of you smart-alecks is asking how I got this hole in my wall. It has nothing to do with my daughters fighting with each other, for the NINTH time in just 3 hours. It also has nothing to do with them completely ignoring my repeated requests for them to stop and my desire to find a new way to get their attention. The fact that the hole is approximately the same size as my hand when placed flat against the wall is entirely coincidental (honest!). So, how did the hole get there? I see no need to sully this blog entry with such petty details.
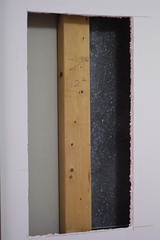
Moving on with the project. The first thing I did was look behind the wall for electrical connections. As it turns out, there is a light switch on the opposite wall of the part I need to cut out. If you ever perform any similar type of repair, please remember to check for electrical connections. As you can see in this first picture, I drew lines showing the part I plan to remove. I am removing a section quite a bit larger than the actual hole because the patch I bought at the store is 2 ft. square. By removing a piece that is 2 ft. high, I only need to make one cut to get a replacement piece that is the correct size.
I used a RotoZip tool to remove the old drywall. A manual push saw could have been used also, but the RotoZip makes this part of the project very quick and easy.
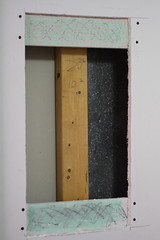
Next I put two pieces of wood behind the old drywall at the top and bottom of the enlarged hole. I secured those in place by using drywall screws. The new piece of drywall will be secured to these pieces of wood. In retrospect, I should have put a third piece of wood in the middle and secured the new drywall there also, as the new drywall bowed out slightly. In order to make the pieces of wood more visible, I drew X's on them and used a piece of chalk to color them green. That is just to make them easier to see in the photograph.
Once the new piece of drywall was cut, I secured it to the wood with drywall screws. Now, you may notice that I actually had to use two pieces of drywall to patch this hole. That is because the master craftsman (me, of course) measured wrong and I cut the new piece too narrow. So, I had to cut two pieces that would fit instead.
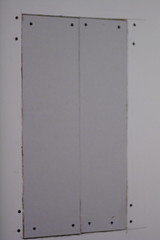
This photograph came out blurry because I had to switch to manual focus. There was not enough contrast to for the autofocus to work. What I should have done was stop down the aperture for more depth of field to work with. Unfortunately, I could not go back and reshoot because the repair was completed already.
The final step is to use drywall mud to fill in the screw holes, and then tape the seams and mud them. I used fiberglass mesh tape which is sticky on one side and I was careful not to overlap the tape anywhere. This last photograph shows the final repair waiting for the last coat of mud. All that is left now is to sand the mud when it is dry, prime the wall, and paint to match.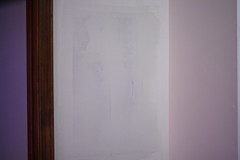


No comments:
Post a Comment