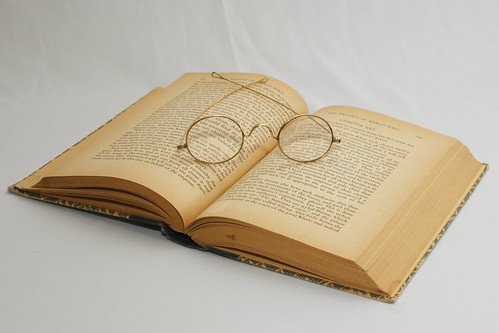
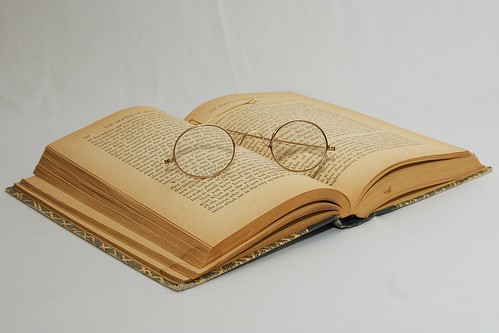
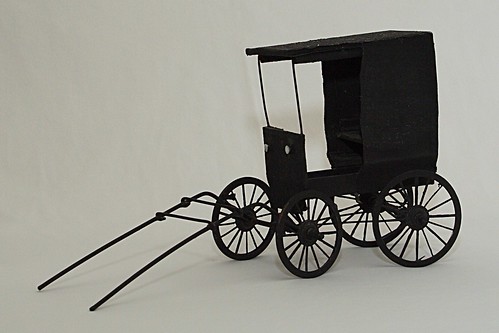
 I invested in an external flash, the Canon 480EX, and decided to do a little studio work on some still subjects. Now, if anyone thinks there is a steep learning curve when starting to use a DSLR camera, just wait until you add an external flash. If you just put the flash on, and point it at the subject to light it, and start shooting, your subjects will definitely be lit, but they will look horrible. Straight on flash is too bright, causes horrible reflections in glasses and skin oils, and just looks horrible. The short answer to this is to bounce the flash off the ceiling, or a wall, or a bounce card. There is something called the Better Bounce card (see the link in my Photography Links section) that is also used to help tame the hotshoe flash. I built one of these to use with my new 480EX. Even so, there are many other factors to take into account such as how much flash exposure to use, what to bounce the flash off, and how to balance the flash against existing ambient light. All of that is in addition to choosing the proper settings on the camera. In short, it can be very complex.
I started by erecting a quick makeshift studio. I bought a white polyester cloth from a fabric store, taped two corners to a wall and let the rest drape over a card table. I wanted to isolate the objects I was shooting so they did not compete with a more complex background. I set up my camera so the external flash was pointing straight up with a better bounce card on the back. I started by leaving the bounce card pointed directly at the subject, but was immediately unhappy with the distinct shadow I got behind the subject.
I needed to get more light behind the subject and balance that against the light being directed on the top and front of the subject. I took two pieces of aluminum foil and glued them to a piece of cardboard to build a reflector. I put the reflector on the right-hand side of the subject and directed the flash at the reflector. I also bumped the flash exposure up to +3. Now, ideally I would have multiple soft boxes and multiple off-camera flashes to work with, but I don't. I have one hotshoe flash, so I have to make due for right now.
I am fairly happy with the results, but even so, there are a few other issues I encountered. The first is the wrinkles in the fabric. You can see them very clearly in the top image. For the more obvious ones, I cloned them out, but I did not remove all of them. I need to find a way to smooth out my background more.
 I also realized every subject I chose needed to be cleaned first. Every little bit of missed dirt, dust, or fuzz will show up in the photograph. For the photographs of the books and glasses I had several places where dust bunnies had followed the books to my clean white background, but I did not notice them until I was reviewing the photographs. I cloned these spots out, but I will be watching for this in the future so I can save myself some post processing time.
The carriage I used for a subject required a quite detailed cleaning. It has been sitting on a shelf for several years, and the top has been dusted, but nothing else. I had to get a q-tip and clean the leaf springs, axles, wheel spokes, and all inside the carriage. I am not very happy with the way these turned out, however. The photographs were not very crisp. I applied an unsharp mask in post processing that helped, but I still feel like the detail did not turn out as well as I would have liked. I took several shots from different angles but never found one I was really happy with.
This was a good exercise for me and I learned a lot. Mostly I learned that I still have a LOT more to learn. I will be searching for more objects to photograph. I also want to purchase a black velvet background for light colored objects.
If anyone is interested in seeing full size versions of these photographs you can see them on my Flickr account. The link to this is on the right-hand side of this page under "Photography Links". You can see all the EXIF data there also.
Now, go take some pictures!


2 comments:
Hey Chris,
There photos look great! Great job on use of the flash and still photography. I'm still scared to use my flash. haha. I prob. need to do like you did and get the external flash. I've used the onboard flash and few times, and exactly like you said, the images are lit, but are harsh. So I avoid usage of the flash almost at all times. If I use it, i don't expect the pic to come out too well.
I've tried that "business card" trick, which I think you are referring to to bounce the light. I need to play with it more b/c I couldn't get it right. Now that I think of it, my ceiling are painted a medium beige, maybe that had something to do with it. But when I tried it, nothing was reflected: Either flash did nothing for the subject or you could see it "cut off" pretty clearly.
good tips on the pics though. I didn't think about having to clean and dust everything as it would show up. I really like the pic of the glasses and the book. Great work!
One tip I used with the onboard that worked quite wall was to tape a coffee filter on the front to diffuse the flash. I have taken many portraits using that trick, and it does help diffuse the flash. The business card trick is just too small and too much light bleeds around from the sides causing weird shadows. I never got that work work right. There is a more complex bounce card you can build, but I can't remember where I got the instructions. If you search Google for Canon bounce card, you will probably find it.
Ultimately, none of that was as good as buying the 430EX, however. I am glad I made the investment.
Post a Comment