I posted an entry not long ago about a homemade backdrop stand, and how sometimes you don’t have to spend the big bucks to get the job done. I still believe that is true, but I did run into some problems with my backdrop stand. It filled my immediate need for a shoot with a client, but when I purchased some larger backdrops, the stand just was not strong enough. I will also say that even though the homemade stand can be taken apart, some of the pieces are still six feet long (or more) which makes it difficult to transport. I shoot on location most of the time so having items that are easy to transport is a huge issue for me.
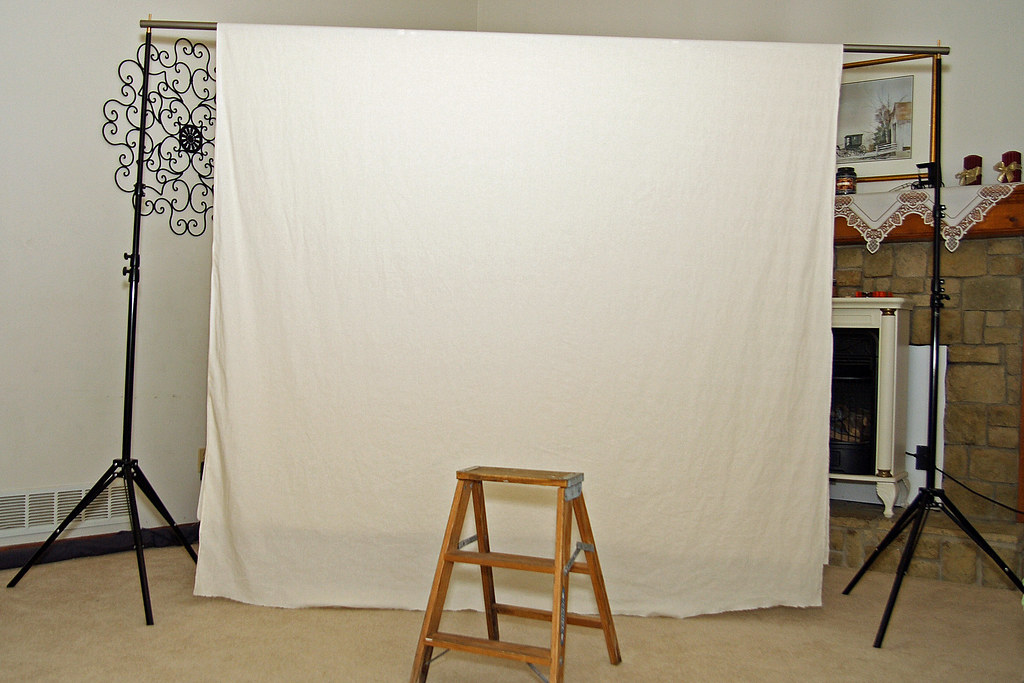
All of that is to say, I broke down and bought a real backdrop stand. Even so, it was not that expensive. I found one at a local photography store for about $160.00. The kit includes two tripod supports which fold down to be very nice and compact. The crossbar that supports the backdrop comes in four sections allowing widths from 3 feet to about 12 feet. It also came with a black cordura case that holds everything in a surprisingly small and easy to carry package. The tripod ends are rock solid and they adjust to more than 8 feet tall. The great thing is I can set up the supports (which start around 4 feet high), and then put the cross bar in place. Then I easily raise the supports to the desired height with no ladder required. The homemade stand required that I put the end supports up, and then set the crossbar on top, which was quite tricky.

I purchased two pieces of muslin from a local fabric store. One is naturally a light tan color which I left. The second I purchased in white and died it black, but it came out dark grey which I am satisfied with for now. Both are 7.5 feet wide and over 12 feet long. I did my first shoot with a client using this muslin and the new backdrop stand and it was great. I was able to move the client about 5 feet in front of the backdrop. I used a cable to move the flash off-shoe and hand-held it about 3 feet to my left. I also used the Gary Fong Lightsphere on the flash. The end result was a nice uniform backdrop, soft lighting and no distracting shadows.I really did try to find a cheaper solution, but they key to the whole backdrop stand is the two supports with tripod feet. I was not able to find any other solution that even came close to the $160.00 for the kit that was designed for this purpose. Does everything related to photography


 I purchased two pieces of muslin from a local fabric store. One is naturally a light tan color which I left. The second I purchased in white and died it black, but it came out dark grey which I am satisfied with for now. Both are 7.5 feet wide and over 12 feet long. I did my first shoot with a client using this muslin and the new backdrop stand and it was great. I was able to move the client about 5 feet in front of the backdrop. I used a cable to move the flash off-shoe and hand-held it about 3 feet to my left. I also used the Gary Fong Lightsphere on the flash. The end result was a nice uniform backdrop, soft lighting and no distracting shadows.I really did try to find a cheaper solution, but they key to the whole backdrop stand is the two supports with tripod feet. I was not able to find any other solution that even came close to the $160.00 for the kit that was designed for this purpose. Does everything related to photography


